
Like most electronic geeks, at some point, you’ll build a project displaying something on a matrix of LEDs! I remember how proud I was many years back displaying things on an 8×8 LED matrix multiplexed using only shift registers and a basic PIC micro-controller! Although all of your “normal” friends will definitely give you the, “oh cool, is that all that huge pile of messy wires does” face.
Now, you can buy ready to go LED matrix modules, with all the drive circuitry for as little as a latte in your coffee shop chain of choice. They provide nice simple interfaces, can be daisy chained and best of all, take care of all the multiplexing so your micro can just get on with your own code. Love it!
I had ordered two of these MAX7219 based modules from banggood back in October last year. I liked the look of them because they are almost boarder-less, allowing you to stack them any way you like. Also each 8×8 LED matrix module is independent, meaning you can have split this 4 way display.
At work, everyone has name plates, which is great for finding someone in the office. I started my current job (~6 Months ago) and my name plate order has not come through yet, so i decided this would be a cool (and geeky) solution! Plus it can do much more than just say who i am!
Construction – Electronics
Beware Orientation!
Perhaps useful for anybody thinking of purchasing these modules for their own projects, something to note is that it seems each display is rotated 90 degrees to what would be typical for 8×8 led matrix modules. What I mean by this is, usually we would have a byte represent a single column (since this is of fixed height and makes font representation easy) where as here, loading in a byte will represent a row in horizontal orientation.

Left, how this module reads in Bytes (bottom or top will depend on orientation). Right, How we would usually read in a Byte to make things easy.
Because of this, trying to use the “MaxMatrix” arduino library will result in some very strange top to bottom scrolling! A quick search revealed the Parola library, an extensive “Library for modular scrolling LED matrix text displays” which not only supports the MAX7219 but also the relevant translations required for the display to function in this orientation. More on that below.

“MaxMatrix” arduino library will result in some very strange top to bottom scrolling!
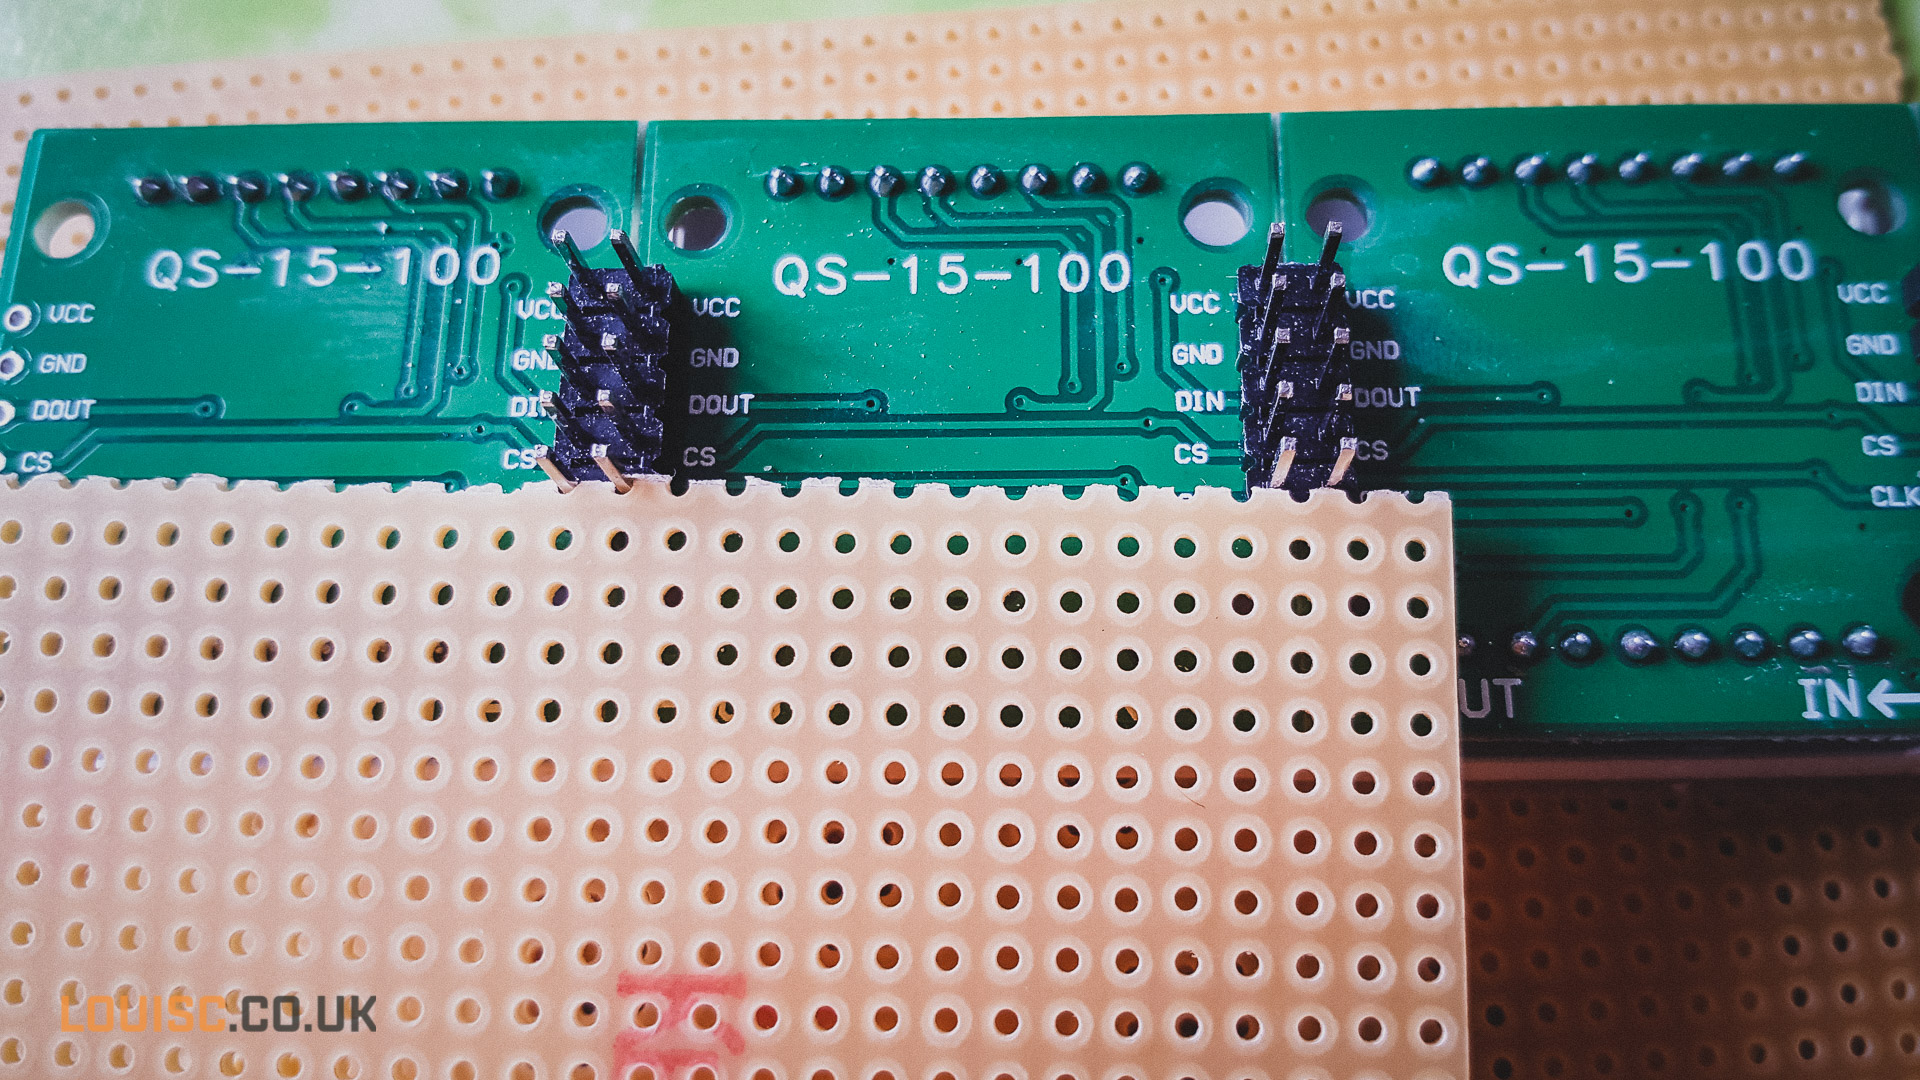
Taking a closer look at the modules, we can see how each 8×8 module is connected within the 1×4 strip. There is a 2.54mm DIL header between each individual module and a set of 5 mini jumpers to connect the module to the next. Interestingly, it is not only this DIL connector which holds the board together, instead of cutting the boards, they have been scored, allowing you to snap them apart if you wanted to.

From the top, you can see that the LED Matrix modules themselves pull out from the board, revealing the MAX7219 which seem only requires a single capacitor and resistor for support circuitry!

Soldering these two 1×4 displays together was simply a matter of using the same method of a 5×2 DIL header originally employed.

Connecting the displays without the added bulk…
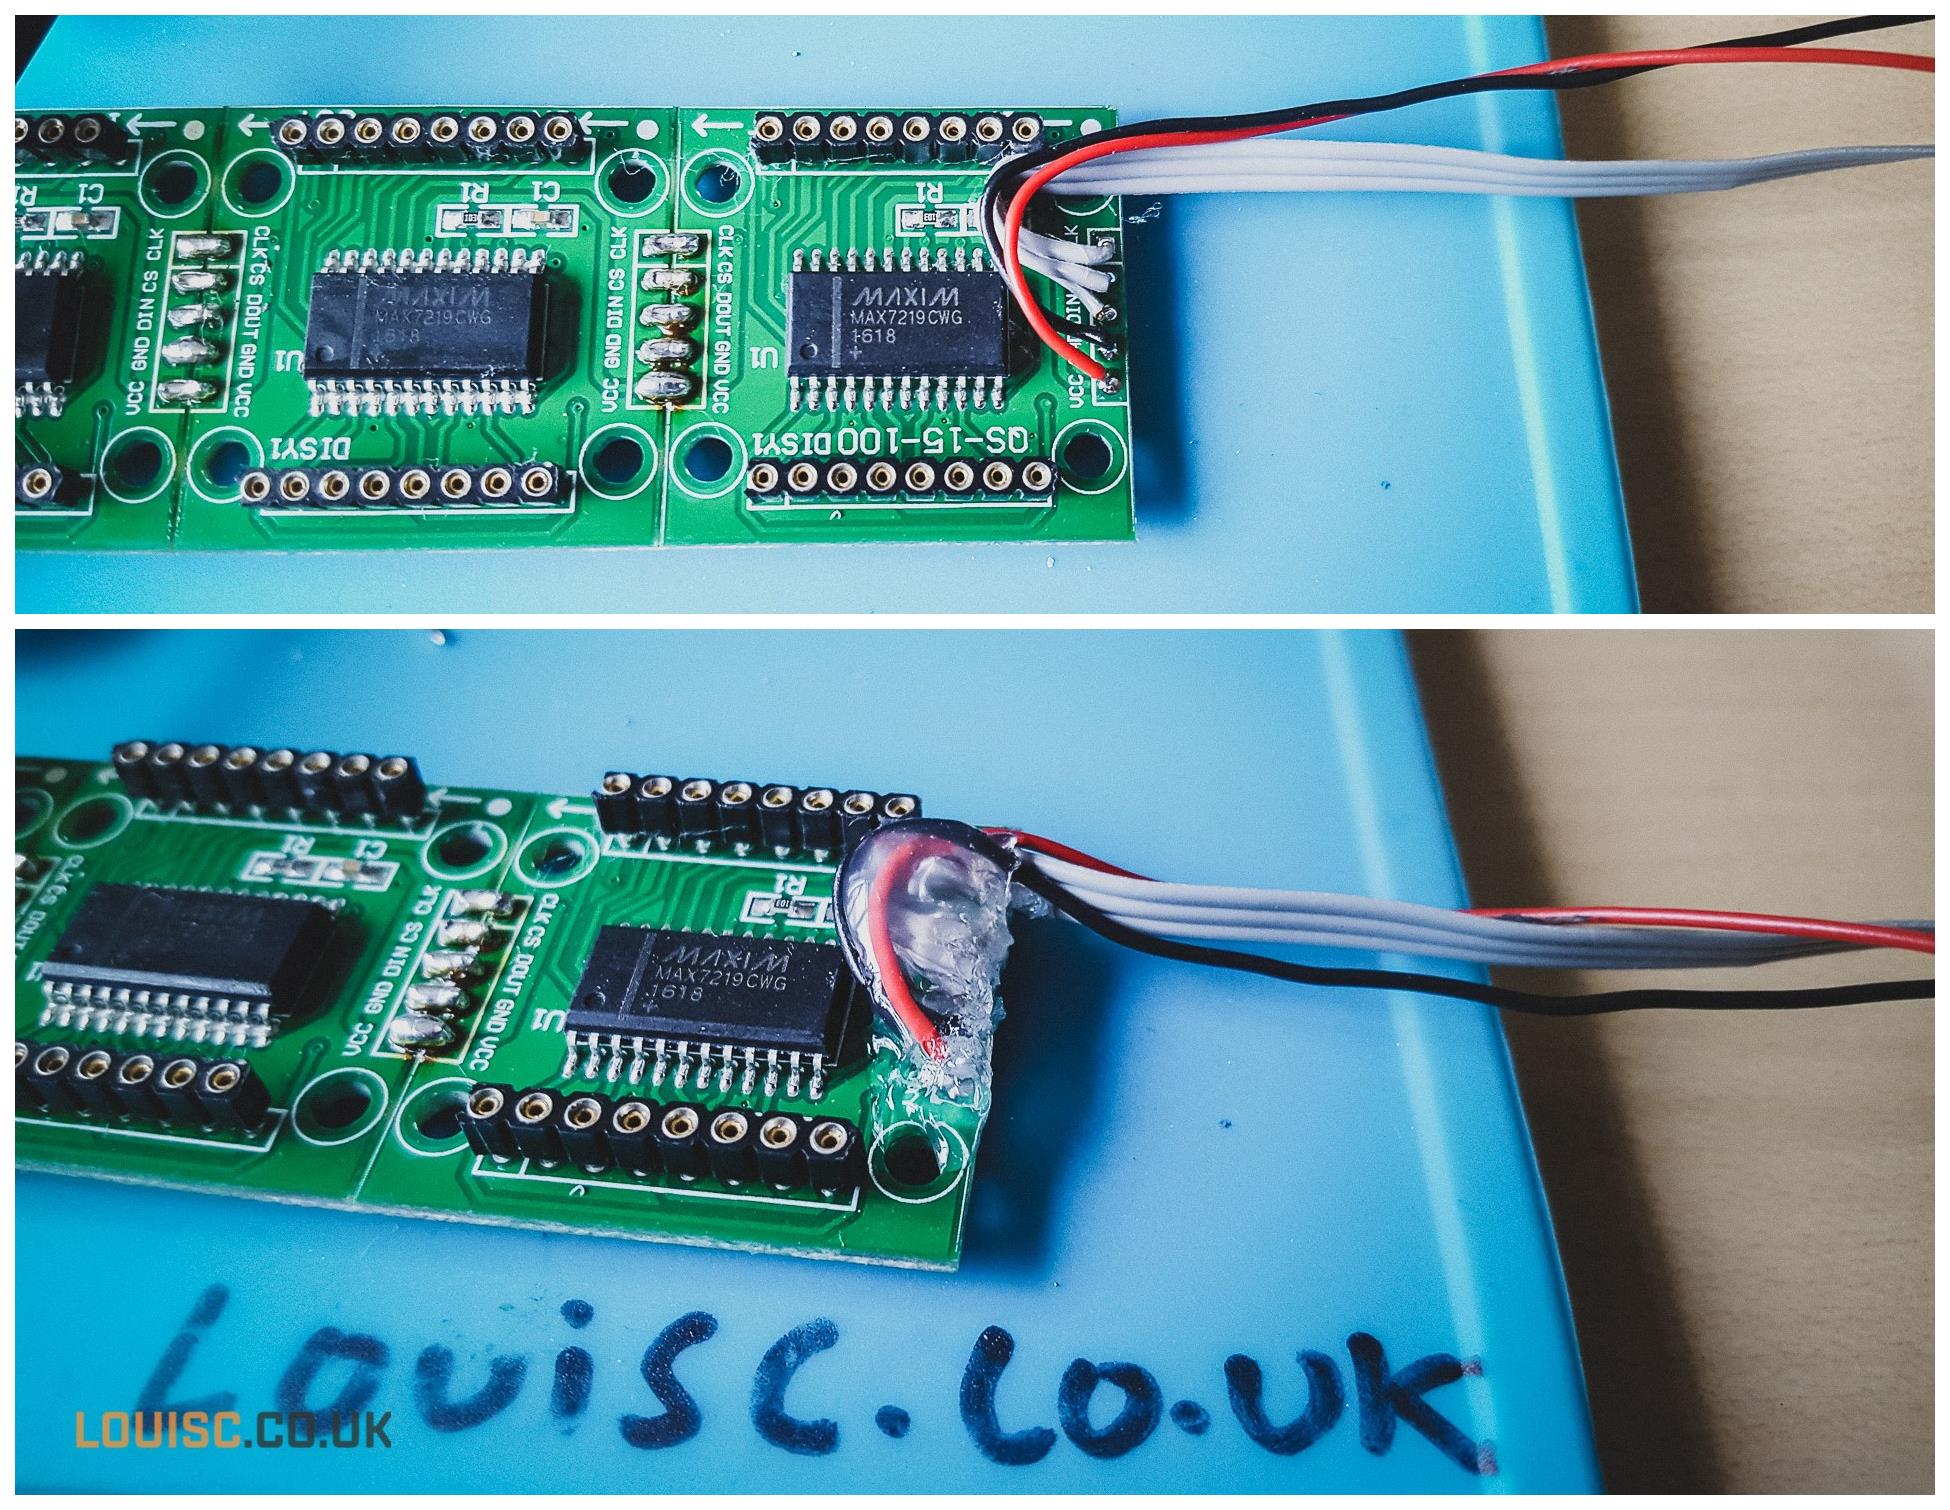
Sadly, although clever, this concept of connecting the modules using the DIL headers and jumpers added significant and needless depth to the modules.Initially, I had planned running a length of strip-board down the length of the display, to connect each module, this was quickly eliminated as an option as the pitch spacing between the length of the board would not line up:
So, simple solution, solder the pins together! Initially I used a some solid core cable but quickly realised this was not required as the solder would happily bridge the gap alone.


On the other side, leaving the plastic spacer construction element of the DIL header meant back and front support each section of the display, keeping things solid:

Connecting up the data and power
For cable, i went with ribbon for data, and some slightly more capable stranded for power. removing the old connector and soldering the cables directly to the board. Straight after identifying and marking the cables the other side, hot glue was used to hide a loop of the wires between the PCB and the LED Matrix Module providing lots of surface area for adhesion for strain relief.
Construction – Enclosure
Next up, an enclosure. This had to be just as streamline as the display, keep a similar aspect and not adding too much depth. Some 2mm clear acrylic off-cuts in the left overs pile would work well.
Mark up and cut two identical strips with width leaving 2mm below and above the display. For length, i left an additional 15mm at each end for the vertical supports to hold the front sheet in place. I just did this on the bandsaw since it had a fine toothed blade installed.
Next up, the holes for the vertical supports are marked and drilled:

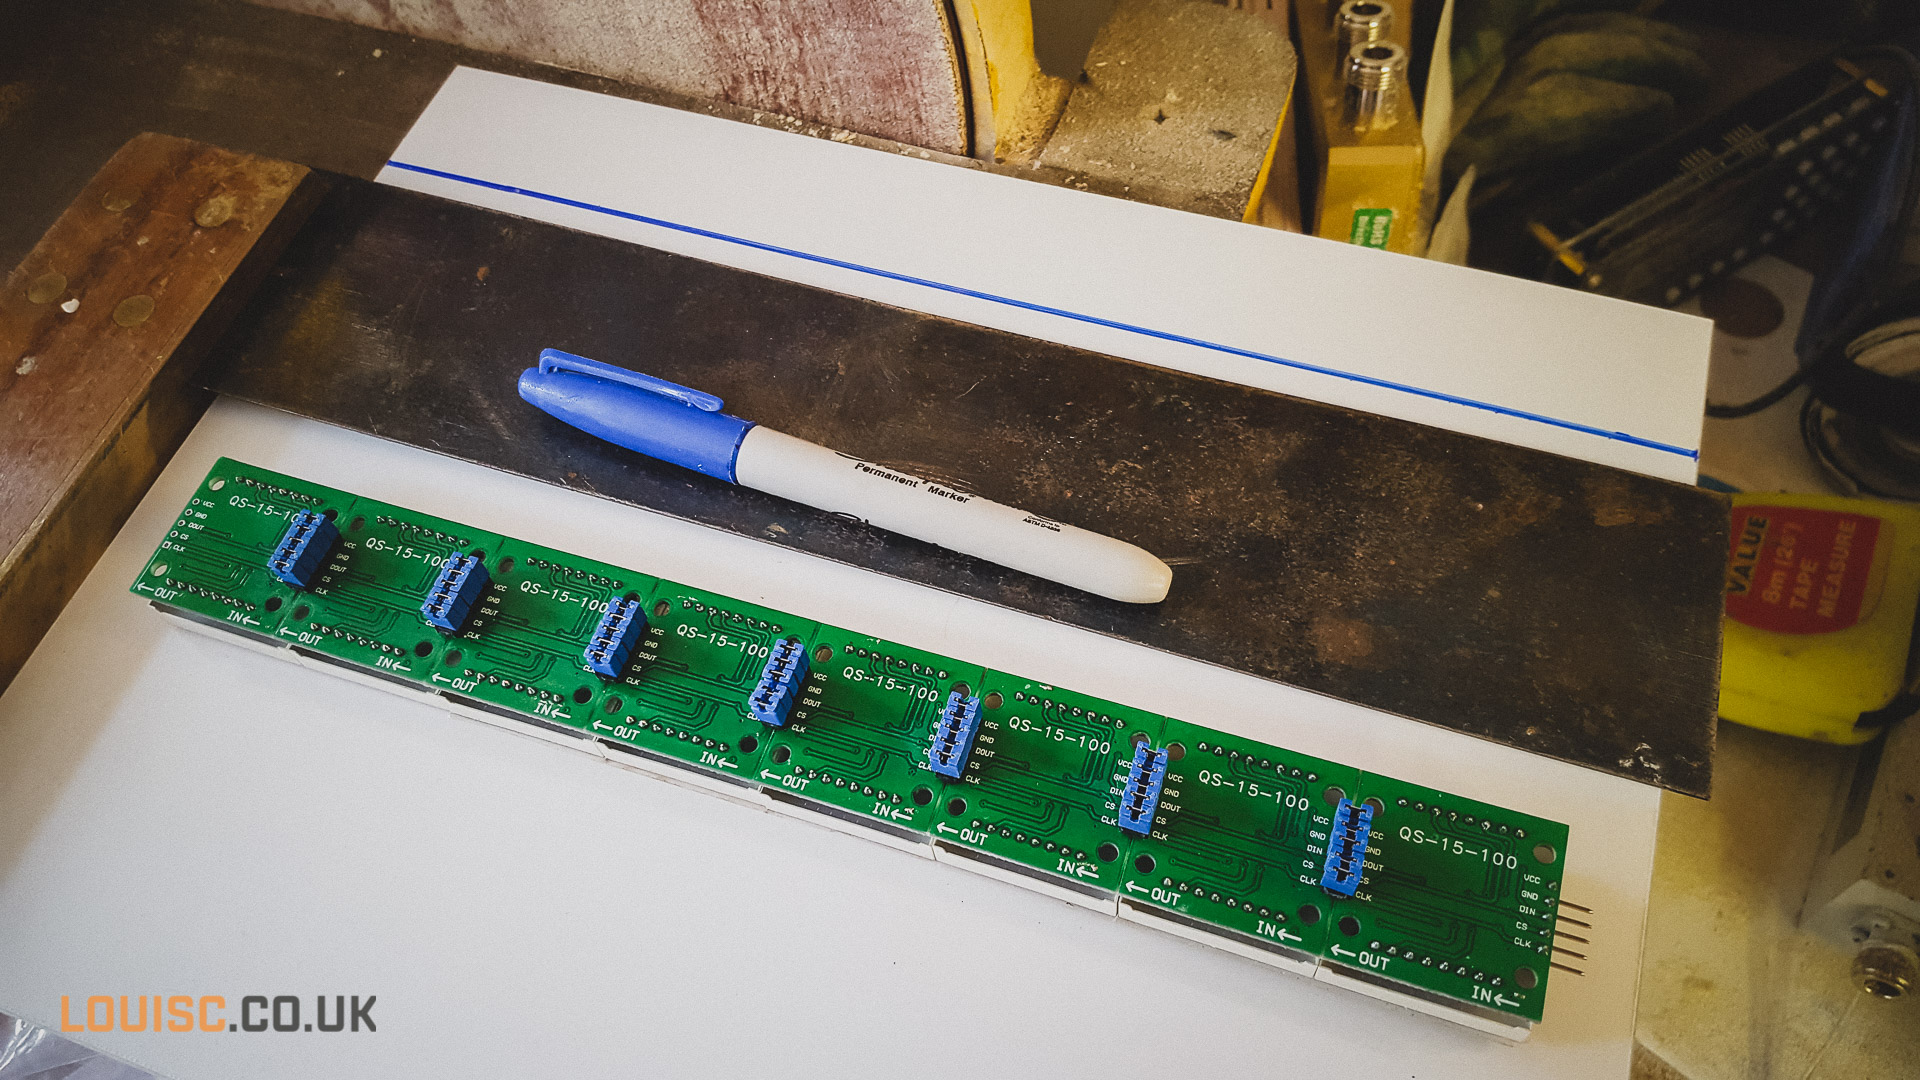
Mounting the PCB
The remainder of the holes for holding in the PCBs were marked by lining up the board and using a pen through alternating holes. These were drilled just tight enough to then use a metal standoff as a tap to cut threads into each hole:

Metal standoff used to as a tap to thread holes
Once the holes were tapped, acrylic screws were threaded in, followed from the top by threaded spacers. The spacer depth was chosen to get the display as close as possible to the top pane of acrylic whilst providing enough clearance for what remains of the DIL Connectors at the bottom of the boards. Finally the PCB is placed above and some nylon nuts were used to secure it into place.


The final part of the construction of this section is to screw on the front face and tidy up the data cable.
For the front face, I found some techy looking hex drive but square head screws in the “Empire of Dirt” (If you don’t watch AvE on youtube, you should!). The suite the metal, clear electronics look…

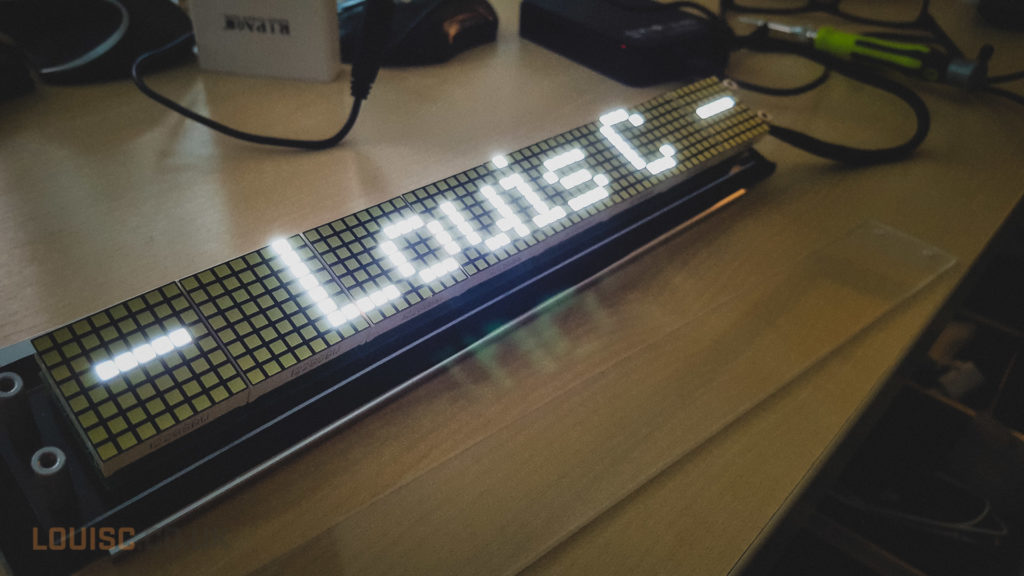
UPDATE: The new LEDs turned up:
Ok, so i hated the red LEDs. They reminded me too much of a shop advertisement sign! So, since the LED matrix displays just push in, i ordered some square white ones from Aliexpress:


I wont link the seller of these modules because at least half of my order was faulty. This may have been down to static since they were not packaged in any anti static foam / plastic:


Leave A Comment